
Auto-Tag Slow Movers as Clearance After a Set Date

Products that have sat unsold past a certain point belong in clearance, but manual catalogue reviews almost never happen on schedule. Set a clearance date on each product and DateCue auto-tags it clearance when that date arrives, so your clearance collection fills itself instead of waiting on a review you keep meaning to do.
Why do slow movers never reach clearance on time?
Most stores have stock that isn't moving, and the usual fix is a clearance section someone has to populate by hand. That review either doesn't happen or happens inconsistently, so dead stock lingers at full price. DateCue replaces the review with a date: tag by clearance date, automatically, no calendar reminder needed.
The approach: when you stock a product (or spot it as a slow mover), set a custom.clearance_date on it. If the product is still around and unsold when that date arrives, DateCue tags it "clearance" and it shows up in your automated clearance collection. If it sold before then, no action is needed. The date is ignored. This is the date-driven tagging that Shopify Flow's date comparisons can't reliably handle, which is why DateCue exists.
Step 1: Create the clearance date metafield
A clearance date lives in a product metafield, which is just an extra field on the product. In your Shopify admin go to Settings → Custom data → Products and add a new definition of type Date. This is the value DateCue watches to know when each product is due for clearance. Create it like this:
- Namespace and key:
custom.clearance_date - Type: Date
Set this on products you're giving a defined sell-by window. For example: stock a product today, give it 90 days, set the clearance date 90 days from now. If it hasn't sold by then, it moves to clearance automatically.
Step 2: Create the clearance smart collection
You want a collection that gathers tagged products on its own. In your admin go to Products → Collections → Create collection, set it to Automated, and add the rule Product tag → is equal to → clearance. Save it. From now on this automated collection fills itself as DateCue tags products.
Step 3: The DateCue workflow
The workflow ties the date to the tag. You point DateCue at the custom.clearance_date metafield, set the timing to fire on the date, and pick the "add tag" action with the value "clearance". When a product's clearance date arrives, DateCue adds the tag and your collection picks it up. Here it is in full:
Timing: On the date
Action: Add tag → clearance
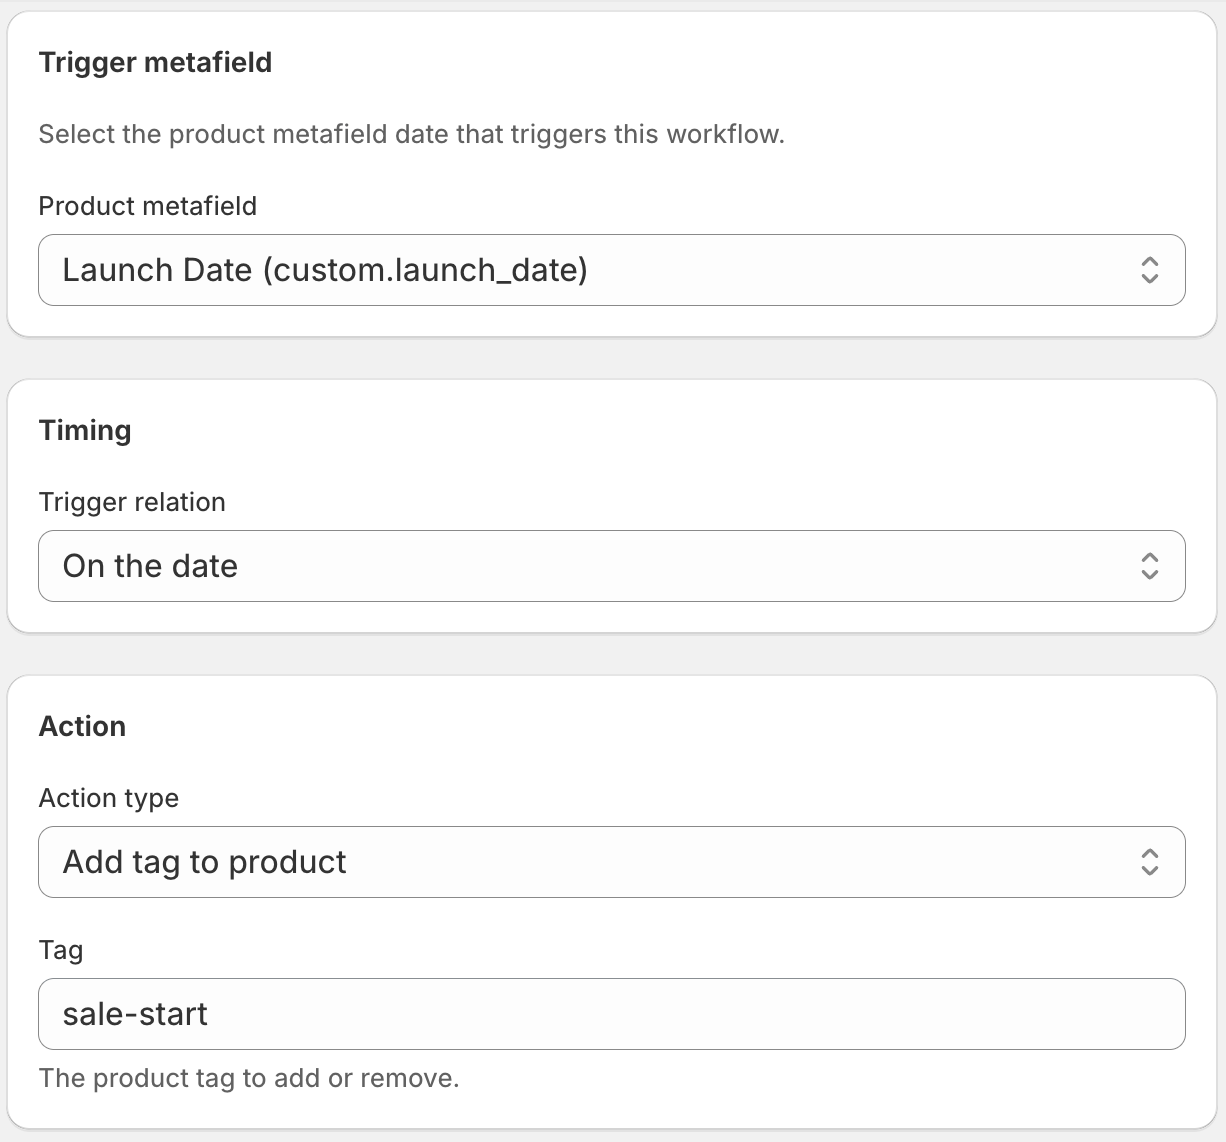
When the clearance date arrives, DateCue tags the product and it appears in your clearance collection. If you've sold it before then, it doesn't really matter. The tag fires either way, but an out-of-stock product won't be visible to customers in the collection regardless. For the rest of this guide I'm assuming the workflow above is live.
Can I only tag products that still have stock?
Yes, with a bit of setup. If you only want clearance to apply to products that still have stock, tag your slow movers with a holding product tag first and point the workflow at that group. Honestly, the cleaner route is to let the tag fire and rely on Shopify's zero-inventory collection rule to hide sold-out items.
How do I remove the clearance tag when items sell out?
Once a clearance product is gone, you'll want the tag off so it doesn't leave an empty slot in the collection. That part is manual: when inventory hits zero, open the product and delete the "clearance" tag, or archive the product to pull it from every collection. DateCue handles the date-based tagging; the cleanup is yours. The same date-driven pattern works for other lifecycle stages, like an automatic last-chance tag before you discontinue a product or an expires-soon tag ahead of a product's expiry date.
💡 Setting clearance dates in bulk: Use Shopify's bulk editor to set custom.clearance_date on a whole range of products at once. Filter your product list by collection or vendor, open the bulk editor, and set the date across all of them in a single operation. This works well for seasonal stock you want to move at the end of the season.
Frequently asked questions
Can I also reduce prices when the clearance tag fires?
DateCue doesn't change prices directly. For automatic price reductions, you'd need to use Shopify Functions or a separate pricing app. DateCue handles the tagging, which feeds your clearance collection. Pricing changes need to be handled through Shopify's pricing tools.
What if I sell the product before the clearance date?
DateCue still fires the workflow when the date arrives. If the product is sold out (zero inventory), the tag goes on but the product won't appear to customers in stock-filtered collections. You can clean up the tag at that point, or just archive the product which removes it from all collections anyway.
Can I notify myself when a product hits clearance?
Yes. Set up a second workflow on the same metafield with a Send Staff Email action. You'll get an email each time a product is auto-tagged clearance, which can also serve as a prompt to update the price. Two workflows fits on Starter ($9/mo).
How do I decide what clearance date to set?
It depends on your product type and margin. A 60 to 90 day window works for most general retail. Fast-moving categories might use 30 days. Seasonal products might be set to clear at the end of the season regardless of time. There's no universal answer, so pick a window that makes business sense for each product type.
How much does DateCue cost?
DateCue is free forever for up to 100 product cues a month. Paid plans start at $9/month (Starter: 10,000 cues) and scale to $19/month (Scale: 100,000 cues, plus webhooks). All paid plans include a 14-day free trial.
Slow movers, sorted.
Free for one workflow. Set a clearance date and DateCue takes it from there.
Install free on ShopifyFree forever: 100 cues/month. No card required.